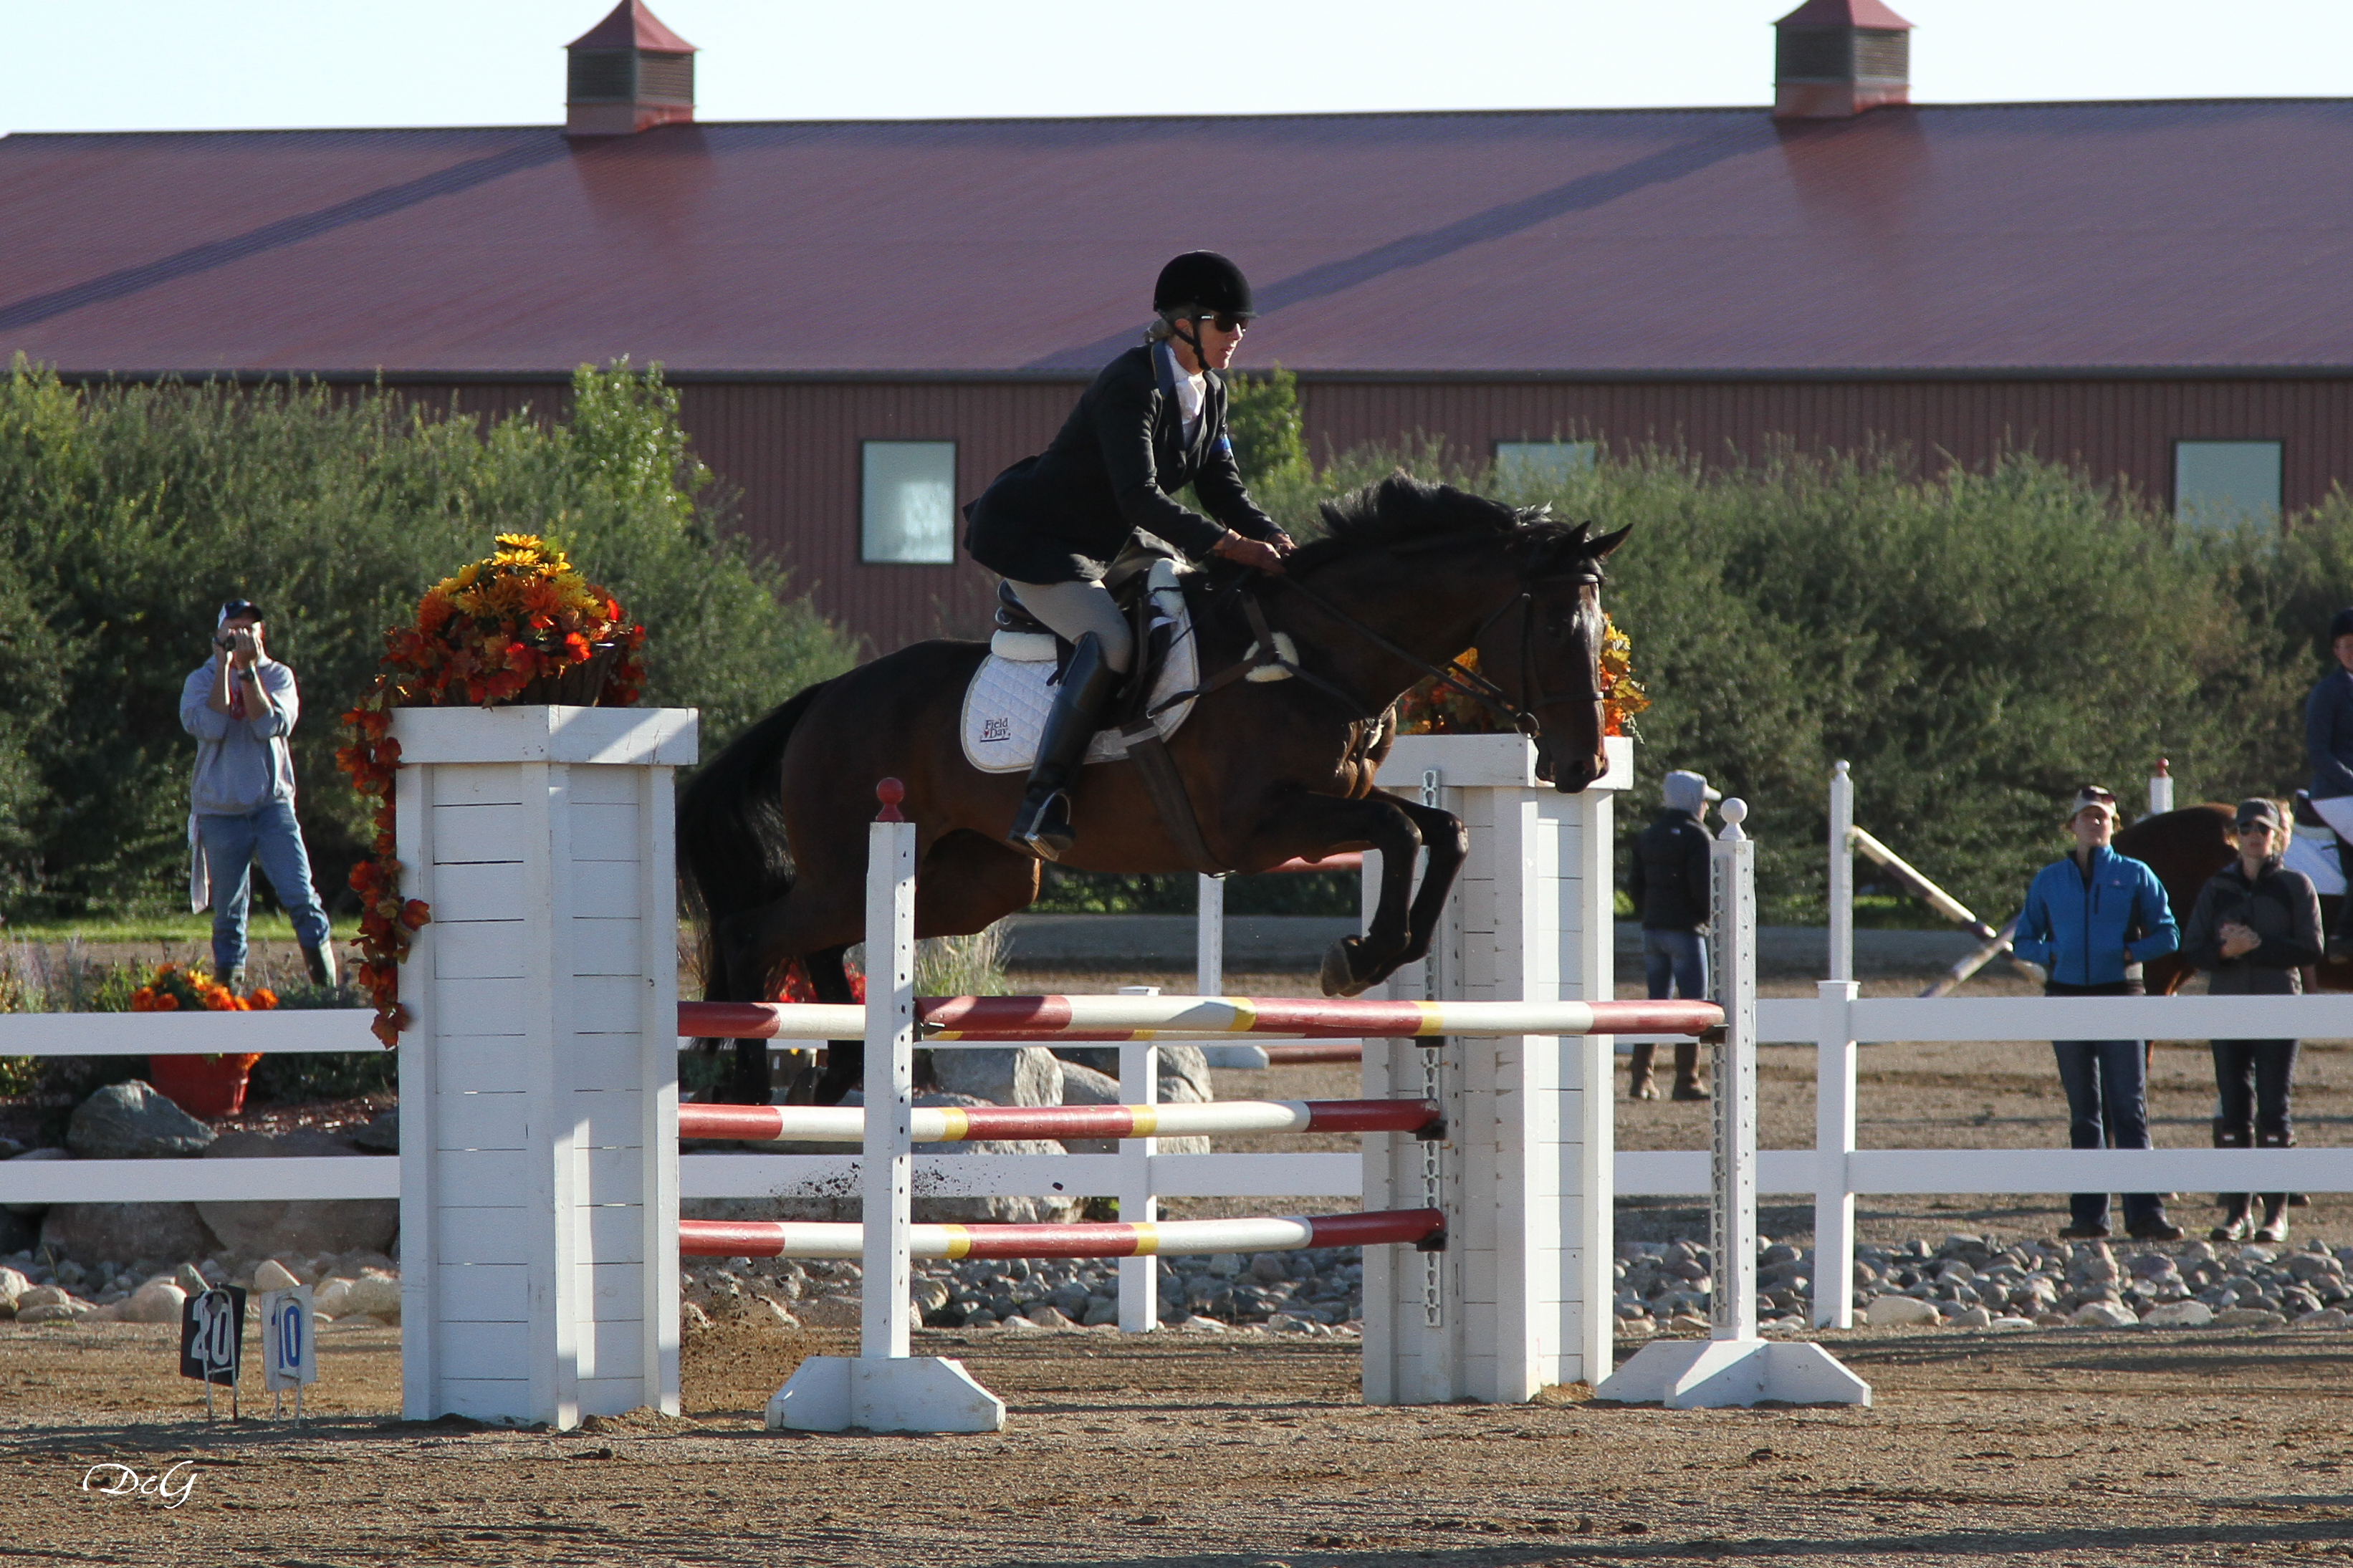
Best Etiquette, Roebke’s Run, September 2014, D and G Photo credit
All I am thinking in this picture is “sternum up.” I should have been thinking, “put your calf on and let go in your knee” too, but one thing at a time. One stride after this fence is a very vertical fence, and all season long Eddie and I had been smoking the oxer and subsequently pulling the vertical in the oxer to vertical combination that pretty much is guaranteed to be on any prelim showjumping course.
See the guy in the grey sweatshirt behind me videotaping? That would be my husband Jay, who is a helluva good videographer – knows how to use the zoom and is rock steady. And I had seen in video after video, images of Eddie jumping beautifully over the oxer (see Eddie above, he is a ridiculous gift from the Universe for which I am ever grateful) and me not holding my back to the second element, thereby pushing him through the distance and resulting in a pulled rail more often than not.
So through the miracle of video and a star of a husband, I’d learned that I needed to keep my sternum up over the fence and in the stride afterward. I’m happy to say we jumped double clear and kept our position in second, 0.2 points off the leader, a wonderful young rider who was as thrilled to win as I was to keep the rail up so Eddie wouldn’t give me that look that horses do when they were great and you messed up.
So what happened there? I learned what was going on, I learned how to fix it, I practiced fixing it for weeks, and then in competition, I had a mantra I repeated like a woman possessed, to make my new habit my default.
Let’s break down the steps of learning new riding habits.
To learn to ride well, first you have to learn where you are in your riding – what you are doing, both good and bad. When I was a kid, I had an awesome shetland pony named Cricket and we went everywhere in every field, gravel road and woods around our farm in Cascade, Wisconsin. Damn, I could ride, I was sure of it. I hardly ever fell off, so I, of course, knew how to ride. (Great childhood logic, still employed by some wildly average adult riders, but I digress.) I went to the 4-H show and there were four riders in my class. I was for sure going to win! I went in, did my thing, and came out with a white ribbon. What?! I was 6, so of course I blamed the judge (another great childhood logic, also still employed by some wildly average adult riders). My sister, who had attained all the wisdom that 12 years on earth provides said, “Of course. You never got a right lead. Duh.” Clear feedback can hurt, but identifying the problem one way or the other is Step One.
Publicly, I was like, “Oh, well, yeah, of course, no right lead” and then privately I was like, “Aaaaaaaaand, what’s a right lead?” Now having identified the problem, I moved on to Step Two: Learning How to Fix It. My brilliant sister and the Sheboygan County 4-H Horse and Pony Handbook (shout out to the UW-Extension system!) taught me about leads. I learned to identify leads by chasing the horses around in the pasture until I could see which lead they were on (I know, awesome 6 year old logic!) and then my sister let me ride her horse so I could learn to identify them from the tack. Then she taught me how to cue for one lead or the other on a straight line (Olympics here I come!). Finally, we went back to my pony and worked on his right lead, which turned out to be no problem once his rider had a solid clue.
I practiced and practiced before my next competition until I could get a right lead in my sleep. (And in fact, I did think about it before falling asleep at night – how to cue and what it felt like to get a left lead versus a right lead. I don’t doubt that I did dream about it.) My mantra on show day had been the one I practiced with, “left leg back, right leg at the girth, sit up”. And it worked. I actually don’t remember what ribbon I received, but I remember the feeling of getting a right lead and knowing I had the right lead. I was grinning like a kid with a smiley face teacher sticker on her spelling test. I am sure the judge and parent-audience thought I was possessed. Awesome.
I am still learning to improve my riding, and teaching others to do the same. Like this:
- Learn what is going on
- Learn how to fix it
- Practice the correct way (develop a mantra)
- Use the mantra when under pressure
Step One: Learning What is Going On
Let’s say you are in a riding lesson and your instructor mentions a particular riding flaw and how to correct it – maybe she says it more than a few times. Or maybe you are watching a video of yourself and you notice a habit you would like to change. Maybe your horse is telling you that when you ride a particular way, he goes better than when you don’t ride that way. If you are lucky enough to ride in an arena with mirrors, you can also gain insights by watching yourself and how your riding position affects your horse’s carriage. These are some of the ways to learn what is going on.
Step Two: Learning How to Fix It
Because William Fox Pitt and I have similar builds, but unlike me he rides with dang near perfect equitation, I use him for an example a lot for myself. I suggest my riders find a riding hero and look at pictures or video of them to observe and then learn, learn, learn what works. I made this graphic for one of my riders who is learning to stay centered in turns and to carry her hands properly. Having a clear mental image of how things should be and the seeing the resultant change in the horse’s carriage because of proper rider position is extremely useful. You have to know where you are going in order to get there.

Step Three: Practicing the Correct Way (and developing a mantra)
Practicing is largely a matter of brain training. Let’s say someone is working on holding their hands in the proper position, and keeping them still relative to the horse. I suggest that they check their position each time they pass a cardinal letter in the dressage arena (A, C, E or B). (Or maybe the sixth fence post on your outdoor arena or pasture, or every 30 seconds while riding out. You could set your watch or phone to beep every 30 seconds or whatever. You get the idea, just be creative.) What will happen is that (assuming you are in a dressage arena), you can fix your hand position at A and by the time you get to E, your hands have dropped/become uneven. You fix them at E, and by C, they have fallen again. In real life, this is what happens when learning a new skill. How you treat the information that to make a lasting change is to make hundreds of repeated small changes is the deciding factor in whether you will be successful in improving your riding. You have a choice each time you notice that you have to make a correction to your position. You can:
A) Judge yourself – hop on the ol’ drama llama and think, “I will never learn this! I’m a bad rider, I can’t maintain it for 15 seconds!”
or
B) Say “Whoopsie!” laugh, and try again.
If you were teaching your child to walk and they bonked on their diapered butt, what would you say to them?
“You will never learn to walk! You are a bad walker! You can’t do it for three steps!”
or
“Whoopsie, honey, good try. Let’s try again.”
Which hypothetical child do you think learns faster? Which kid is having more fun? (Hint, the answer is the same for both.)
Your inner voice should be that of a relaxed friend. If it isn’t, tell it to dry up and blow away, and then create a new script. Your inner voice is you. You can make your inner voice use the tone you like. There’s a bit about this in the “Black Box and the Gold Box“.
 While you are learning your new skill, a mantra will naturally develop. For keeping hands up, I like to think of a butler carrying a tray like this guy. He has excellent posture, with his shoulder blades down his back and he carries his ribcage and forearms in splendor. So, “Butler” became my mantra for that.
Step 4: Use the Mantra When Under Pressure. Now you have identified where your riding needs improvement and gotten into the habit of frequent and kind self-checks. At your next show, where you used to ride around the warm-up just generally trying to do your best while continuously noticing how great everyone else looks, now you have developed the presence of mind and habit of frequent self checks that keep you focused on the fundamental skill you are developing and YOUR riding, not everyone else’s. So you are replacing self doubt and habitual comparing of yourself to others with a proactive, familiar mantra. Your Butler will carry your through!
Very good, Mum. 🙂

 OK, not really just me and the Dave hangin’ out, but today I was at Longview South in Ocala, FL at the USEA Instructor Certification (ICP) Symposium – kind of a continuing education deal for ICP instructors or other interested horse junkies.
